Weather information plays an increasing role in project management and planning. This tutorial shows how you can add weather data to your Kanban board in LeanKit planview within seconds for free and even without any sign up process. The weather page will show forecast data if your activities depend on the upcoming weather as well as historical weather if you rely on the past days conditions (for example to verify it did not rain for the last few days). The information can be viewed on daily or hourly levels.
Step 1 – copy the URL for your individual location forecast
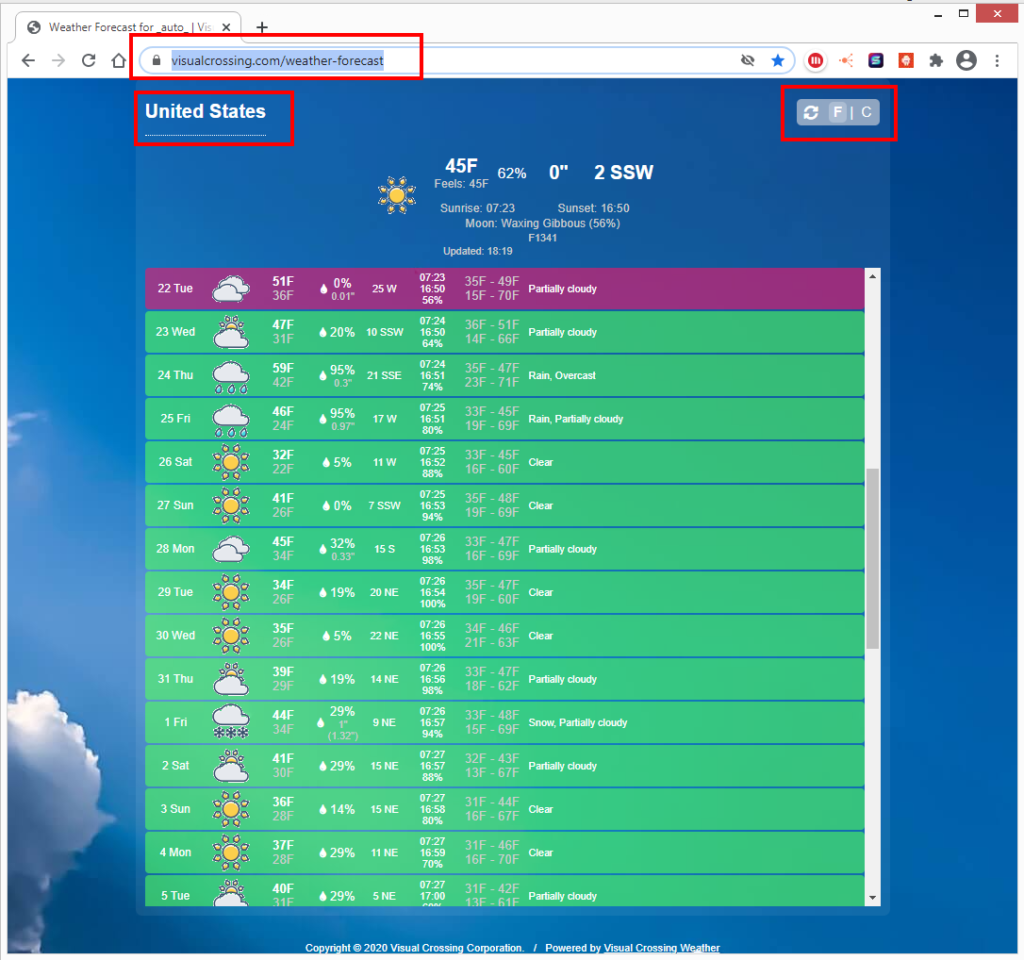
Navigate to the free Visual Crossing Easy Weather Forecast site in your web browser: https://www.visualcrossing.com/weather-forecast , enter your location of interest and your preferred measures units.

Once the site updated copy the parametrized URL. For example for Hamburg, Germany and metric values: https://www.visualcrossing.com/weather-forecast/hamburg/metric
Step 2 – open your LeanKit planview and select the Kanban board you are working with
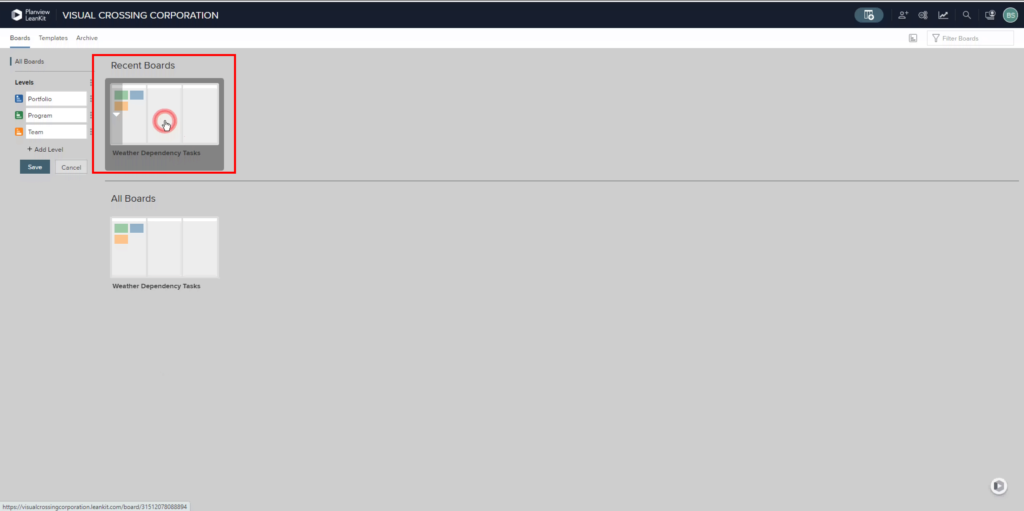
Once you logged into your planview application select the Kanban board you are working with from the ‘Boards’ tab on the home page

Step 3 – Create or edit the card containing your weather related tasks
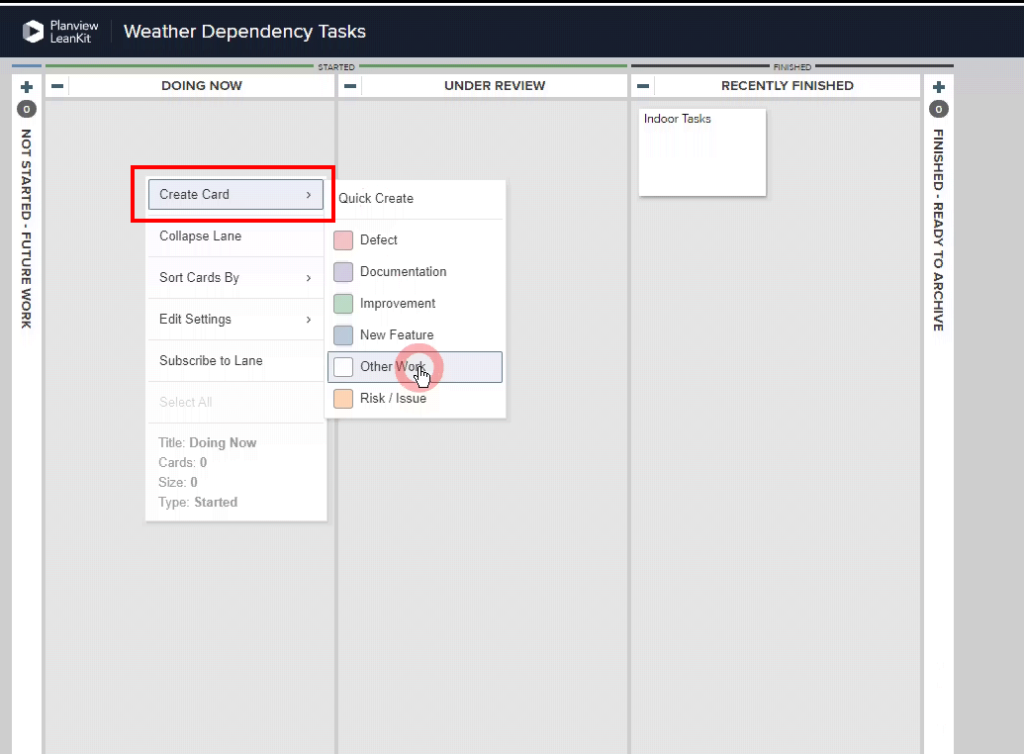
Select the card you want to add the weather data to or create a new card by right clicking on the Kanban Board and selecting the ‘Create Card’ option from the pop up menu.

Step 4 – Enter the URL to the ‘External Link’ section
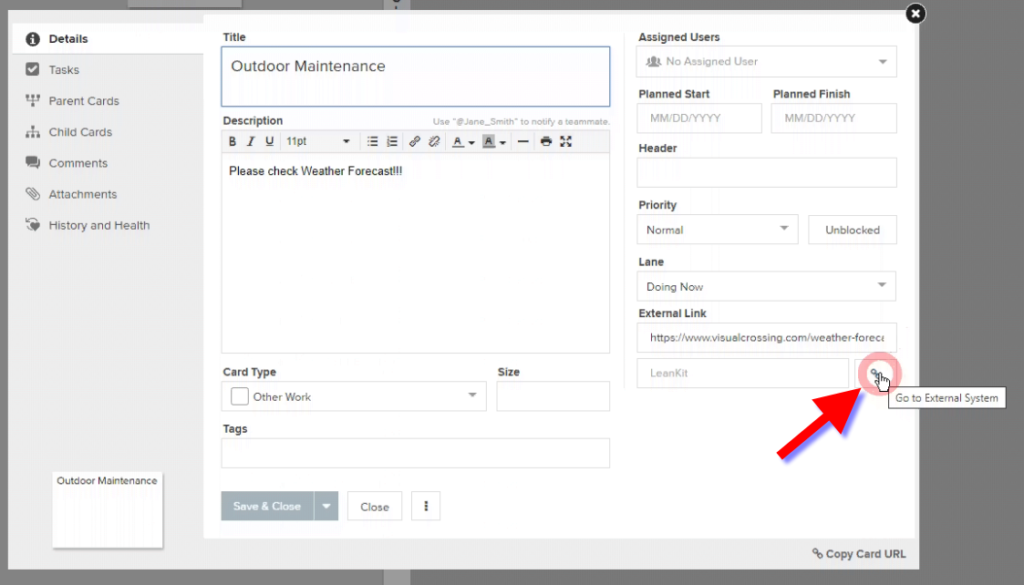
On the card enter or change your information as required and add the URL generated under Step 1 to the form filed ‘External Link’.
Click the ‘Save and Close’ button when finished.

Step 5 – call the weather information when needed
When working on your card you can simply click the external link to access the weather information on the Visual Crossing Easy Forecast Site.

NOTE: adding multiple locations as ‘Custom Attachment’
For advanced use cases one can add multiple locations and individual weather parameters or time frames as so called ‘Custom Attachment’ using the Visual Crossing REST API. For details please see the LeanKit API Guide https://success.planview.com/Planview_LeanKit/LeanKit_API/01_v2/attachment/create and the corresponding Visual Crossing API documentation.
