The ability to add or remove elements from weather data or columns is incredibly useful in various scenarios. By using this capability, researchers, meteorologists, and data analysts can streamline their data sets for optimum performance and focus solely on the relevant information for their specific research or analysis.
Removing unnecessary weather elements that do not contribute to the final objectives not only makes the data easier to read, it also makes the queries run faster, data downloads smaller, and processing easier. Eliminate irrelevant columns can improve the efficiency and speed of data processing, leading to simplified code and faster results.
Overall, the capacity to delete or modify weather data elements empowers users to tailor their datasets to meet their unique requirements, enhancing the overall quality and usability of weather-related research and applications.
In addition, to removing elements from the result set, the user can also add elements that are not there by default. This use is important when dealing with more specialized elements such as our advanced energy or agriculture measures. Assuming that you have the proper licensing, you can use these measures simply by adding them to your query as show below.
Using the Weather API
To add or remove weather data elements when using the weather API directly, you simply add the “elements” parameter to your query URL. An example elements parameter looks like this:
elements=tempmax%Ctempmin%Ctemp
Using this parameter tells the server to only return three elements in the result data. Those three elements are “tempmax”, “tempmin”, and “temp”. You have separate then with %C for the elements to work.
You may also use the + prefix to add elements to the default set of elements. In this example, the US Air Quality Index is added to the list of default elements.
https://weather.visualcrossing.com/VisualCrossingWebServices/rest/services/timeline/New York City,NY?unitGroup=metric&key=YOUR_API_KEY&contentType=json&elements=+aqius
Note that in most systems, the ‘+’ character must be URL encoded:
https://weather.visualcrossing.com/VisualCrossingWebServices/rest/services/timeline/New York City,NY?unitGroup=metric&key=YOUR_API_KEY&contentType=json&elements=%2Baqius
For more information, please see the weather API documentation.
Using the Query Builder
You can add and remove weather elements in the Query Builder interface also. First go to the Query Builder interface and compose your query. Query Builder can be accessed directly through your web browser.
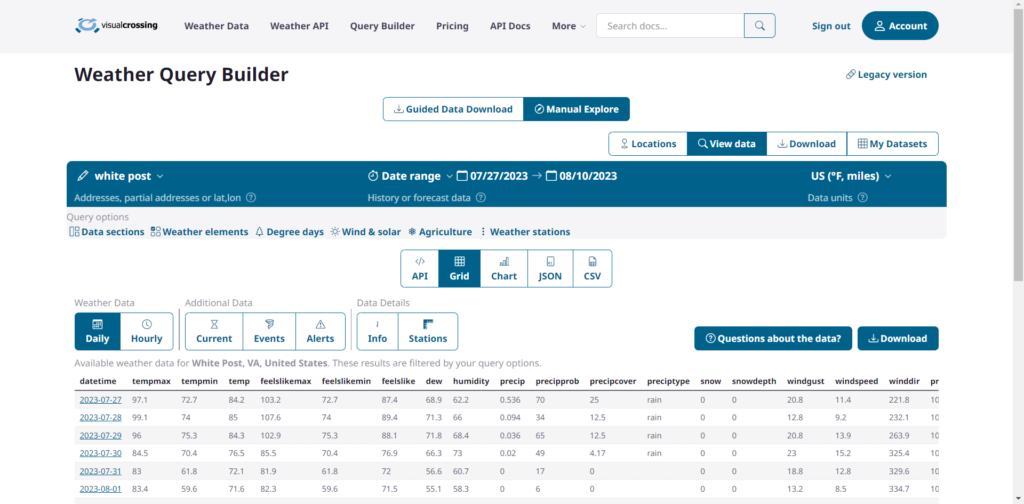
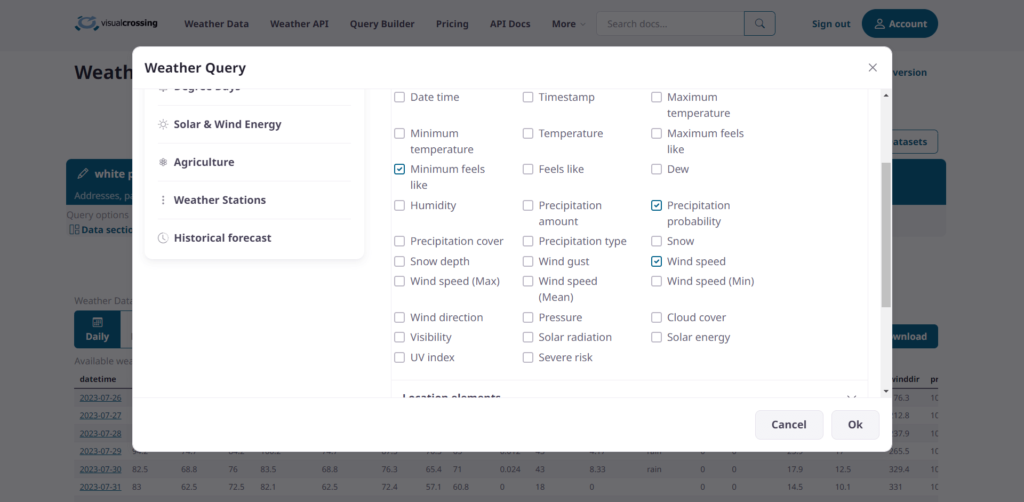
Click on the “Weather Elements” option within the interface. This will display a list of available weather elements.
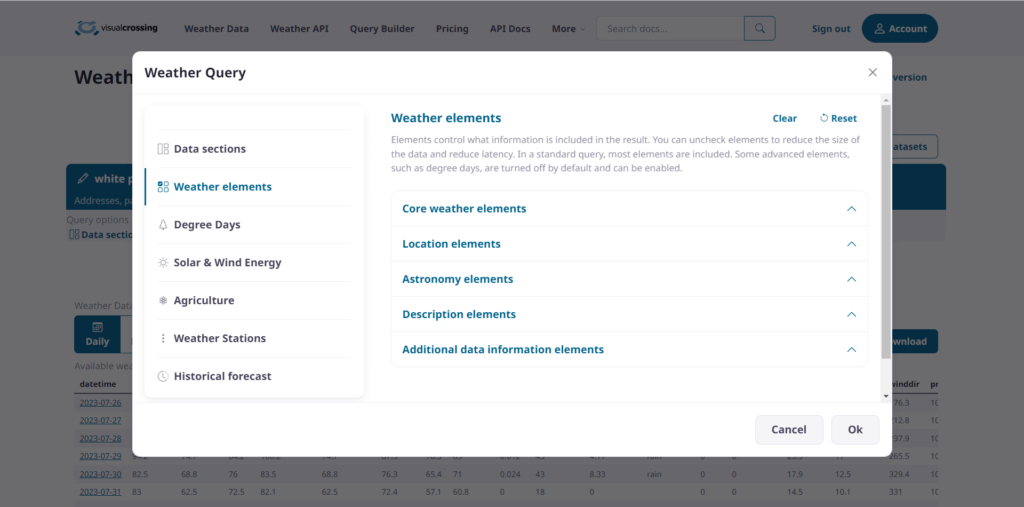
Review the list of weather elements and identify the ones you want in your results and the ones that you do not want.
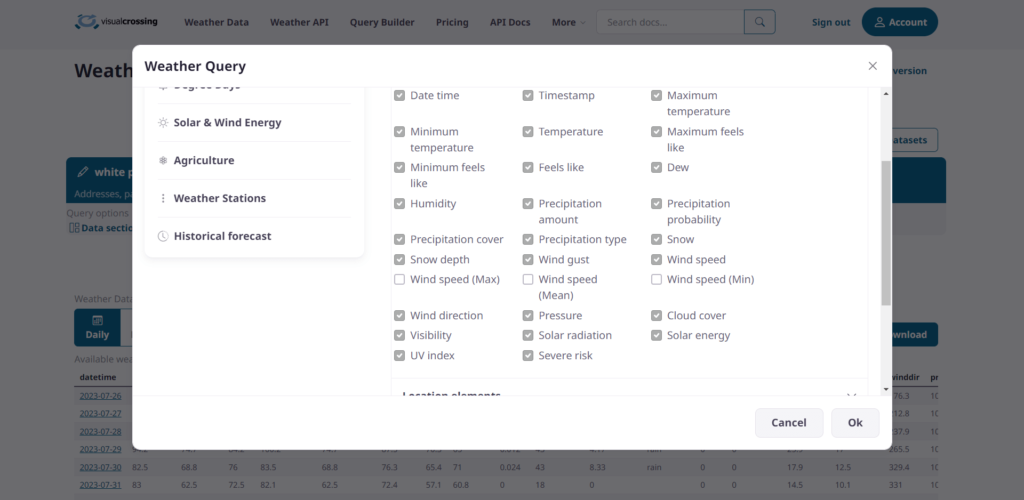
Click on the weather elements that you want to add or remove from the final data output. Checked elements will be included in the query results and unchecked elements will not be included.
Guided Date Download
The process is similar when using Query Builder’s Guided Data Download mode. However, the element selection is integrated into the download flow in this case.
One you enter the Guided Data Download wizard, you will first need to select your locations. Then, in step 2 you will see the “Open advanced options” selection. Click it to open the advanced options window.
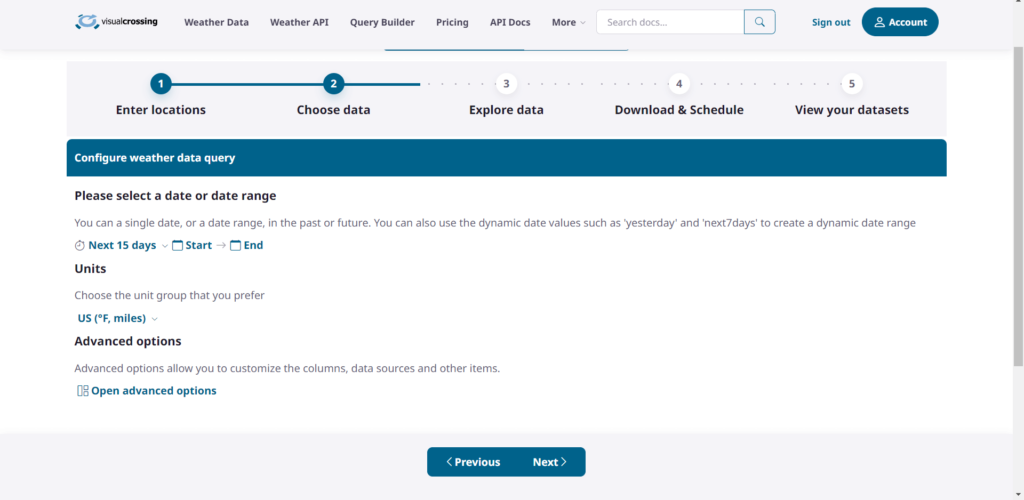
Find the “Weather Elements” option within the expanded menu.

Click on the “Weather Elements” to access the list of available elements.
Review the list and then select or deselect the weather elements as you wish them to included or excluded from your result dataset.
Summary
By following these steps, you can effectively adjust your weather data queries and tailor your results to focus on the specific weather elements required. This customization ensures that the data returned in your result data is relevant to your specific use case and that your queries run as efficiently as possible.
Questions or need help?
If you have a question or need help, please post on our actively monitored forum for the fastest replies. You can also contact us via our support site or drop us an email at support@visualcrossing.com.
